Whether you cook every day or only occasionally, the kitchen is the hub of most households. When your kitchen is well organized, the entire house functions more efficiently. Streamlining your kitchen is a time investment that will yield an excellent return. Here is a simple four step process to declutter and organize any kitchen.
Step 1: Clean out your cabinets, pantry and drawers.
You don’t have to do this in one fell swoop, you can break this step into smaller ones. Begin by creating as much open surface area as possible, you will use this space for sorting.
As you create the open surface area remove anything that clearly does not belong in the kitchen. Perhaps there are toys, tools, or books. The kitchen is often the landing place for items that belong elsewhere. It’s positively uncanny how this room seems to attract all kinds of non-kitchen stuff (some of my clients wonder if there isn’t a magnetic force field in play).
Now you are ready to remove everything from your cabinets, drawers and pantry. As you remove things, start sorting the items into categories, grouping like items together.
Clutter Quick Tip: To keep counter clutter in check going forward, you can put designate a container to collect all the miscellaneous items that tend to land on counters. Then schedule five minutes once a week to re-home those items. This will help eliminate all that visual clutter. I use a basket that coordinates with my kitchen decor, so it looks like it belongs (that’s about as Martha-y as I get).
Step 2: Cull, and purge the excess.
As you group things together you will be able to see exactly what you have. Let go of the things that you have not used in the last six months, and don’t have a concrete plan for using in the next six.
Typical unused items in a kitchen might be bread-making machines, specialty baking pans, rotisseries or deep fryers. If one of these items was a gift and you have thanked the giver, you have no further obligation to the item, let it go. If you bought the item yourself and haven’t used it, don’t berate yourself up for a bad purchase. Absorb the lesson, realize good intentions sometimes don’t go as planned and let the item go.
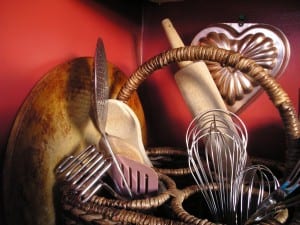
If you have multiples, and people so often do, choose the best of the bunch and let the others go. There is no point in owning six vegetable peelers. Multiples take up valuable space and make finding just what you need more difficult. If you have to sort through a crowded drawer to find the one peeler you wanted, you will waste time, become frustrated and possibly injure yourself (I have seen it happen, and it’s not pretty). Two of an item is generally the maximum any household needs. You should be able to look in a drawer or cabinet and not be overwhelmed with visual stimuli, meaning you should be able to clearly see each individual item. If you’ve got a collage, you need to pare away (pun intended!) a bit more. Keep only the items you need and use.
Step 3: Rethink where things should go.
 Make ease of access the driving criteria. Think about how you use your kitchen. Store frequently used objects in easy-to-reach locations (e.g., keep coffee mugs above the coffee pot). Items used less frequently, such as roasting pans, should be stored on a high shelf or in the back of a cabinet. Items that are used less than once or twice a year can be stored outside the kitchen, and should be if space is an issue. Overcrowding your cabinets and drawers is a sure fire method for attracting frustration.
Take advantage of the kitchen triangle. It’s the triangular area you can create from your sink to your refrigerator, and from your refrigerator to your stove. It is the most valuable space in your kitchen. Think of it as prime culinary real estate. Within this triangle you should keep the items you use on a daily basis for food preparation and cooking.
Take your family’s special needs into account. If you make sandwiches regularly, consider putting a small tote bin in the refrigerator to hold all the condiments you normally use, instead of storing them in the door as is common. You will be able to grab the bin in one quick move, sparing yourself the where’s the mustard question.
Step 4: Adopt the ETE habit.
ETE stand for Eliminate the Evidence. It’s a habit worth embracing. ETE simply means you pick up and/or put away as you go. Don’t wait until later. If you make a sandwich – put away the fixings and wipe down the counter. Then eat your sandwich, put you plate in the dishwasher, and no one will know you were even in the kitchen.
ETE can help you keep the rest of the house under control too. If you just pick up an put away as you go, you will never have to endure a marathon cleaning session again. (Did you know that clutter effects your health? It does, and while that might not surprise you in the least, the level of impact might.)
Like all new habits it will take some effort to integrate into daily life, but when you see the results you will wonder why you didn’t do this sooner.
And if you’re feeling like you could use a little help with the whole clutter clearing and organizing process – I’ve got you covered. The ESCAPE Clutter & Get Organized E-Course is my gift to you. In six lessons I walk you (holding your hand the whole way!) through the declutter process!
*Photo credit: Kyle Smith